For some people, the so-called washed day seems to be a dreary experience where they spend long hours cleansing, detangling, masking, purifying, trimming, and what have you. If your wash day scares you or makes you procrastinate, then you might probably be doing something wrong.
Keep reading to find out the 5 things you could be doing wrong on wash day
Hi Lovelies! Doing a Hot Oil Treatment before a full wash, greatly helps your hair in terms of reducing tangles by oiling the hair strands and enabling them to glide past each other rather than tangle up during your Wash Day Process. I normally do my own home produced hair treatment but this time around I bought one of these hand made all natural hair treatment online from the company Lush.
These come in a range of natural hand made products. The one I chose was the 'Hair Doctor. 'The ingredients include Coconut Oil,Jojoba Oil, Rosemary and Red Henna. All these infused together work to leave the hair feeling stronger and nourished and ready for the somewhat wear and tear process our hair actually goes through on every Wash Day. The Treatment comes attached to a wooden stick on which directions for use are clearly highlighted.
My hair was left looking and feeling amazing! Any Hot Oil Treatment will work a treat on your Natural Hair prior to washing. Give it a try if not already doing so!
Have you ever wondered why your gel is flaking or why you have flakes in your hair or your child's when using gel or why you have white residue with you use gel?
In today's video, I will show you how to avoid getting flakes in your hair.
Happy Tuesday Ladies! After hearing so much about the new Eco Black Castor and Flaxseed Oil Gel, I finally decided to give it a go!
The Gel comes in a new flip top tub, feels really smooth to the touch, not sticky and heavy like some traditional Gels. It has a rather pleasant and sweet smell and applies easily onto damp hair that has a Leave In Conditioner on it. I applied the Gel over my Cantu Curl Activator and let the hair air dry undisturbed for three hours.
Two weeks ago, I started teaching my 8 year old how to wash her own hair.
When it comes to kids hair care, especially when you have to let go and let them do their hair, start "small-small".
First teach them the proper way to detangle their hair. Detangle in section, and from ends to roots.
Explain why it is important when shampooing to apply to scalp first and using your finger-pads and not finger nails to massage the shampoo into the scalp.
Let them know that conditioners is the key to softness and most not be skipped when shampooing.
Most of all HAVE FUN and don't make it a Stressful thing.
Remember, they are still learning, don't rush them, if they still cannot do it themselves,.
As I showed my daughter how to do it, she had a new appreciation of this magical crown that God has given her, the power of shrinkage and the numerous styles that can be created on her hair.
I think we can all safely agree that when it comes to Natural hair, a good Pre Poo routine is required to enable our hair to go through the Wash day process, tangle free and therefore free from the threat of breakage and damage.
For my Pre Poo, I use Extra Virgin Coconut Oil which aides in protecting the hair strands against Hygral Fatigue 9the result of contant, excessive swelling of the hair cuticle as water is absorbed and the contracting of the hair cuticle as it dries.)With every Wash ,your hair is susceptible to Hygral Fatigue and thus, Potential damage. Coconut Oil prevents this from happening and thus protects your hair.
I couple my Coconut Oil with a Conditioner with extra slip to help with the detangling process. My Conditioner of Choice is the Biotin and Collagen Conditioner by Organix. This Conditioner provides amazing Slip!
Wash Day can be a struggle for kids with natural hair. Today, I will share our Quick and Easy Natural Hair Routine for Kids when it is time to wash natural hair. I will provide several beauty hair hacks throughout the video including how to make Hair Custard.
Her hair was shampooed with a product that works for her High Porosity Natural Hair.
We did a conditioning with a multi-purpose conditioner that works as a deep conditioner and leave in.Information about multipurpose products: https://www.youtube.com/watch?v=cxiVXdHIQEQ
Moisturizing is the most important part of wash day.
Weaves have a lovely aesthetic appeal, however they tend to be taxing when it comes to hair care. I've always liked the look but the number problem I have been faced with each time I weave is how do I moisturise and wash my hair in these extensions??
I have 3 tips to make your weave experience easier.
1. Wash in sections
Section your weave into 8 or more pony tails. Secure them tightly about 5 cm away from the scalp. This not only gives you easy access to your scalp, but prevents the extensions themselves from tangling. You may have to look like your 4 year old sister, niece or cousin for the next hour or so, but it is so worth it cause the ease of access is wonderful. Wash, rinse and condition, concentrating on your tracks underneath and not the weft.
2. Use an applicator bottle with a nozzle to oil your scalp
Accessing your tracks is super tricky when weaving. You want to ease the itch that has you patting like a mad woman without looking as mad as you already do patting around. Get an applicator bottle with a nozzle, filled with an essential oil like peppermint, tea tree or lavender oil and a lighter oil of your choice. Then apply this every two days or everyday of need be. It will soothe the itch whilst enhancing growth. But most importantly, it will stop the excess oil from getting onto your extensions thereby weighing them down.
3. Always leave your edges out
I can't emphasise this enough. What stops most people from weaving is the fact that they lose their edges. I was one of those. But once I learnt that it was possible to weave and keep my edges too, I dived right back into the world of extensions.
Three simple tips for better weaving. How do you make your weave experience better? Comment below
Last week I gave you 10 good reasons to try a shampoo bar. Knowing me, I want you to get the whole picture before trying something new. So this week we are talking about some of the things you should think about before exploring the world of shampoo bars. Let's dive in!
There may be tangles from having to rub the bar into your hair. You can easily remedy this by dissolving the bar in some water to liquify it. You can also wash your hair in sections.
Another drawback is that the oils can give the soap a waxy nature that tends to leave a waxy layer on your strands. When the soap reacts with water it can cause a waxy film which will build up over time. Again the solution to this is to follow up with an apple cider vinegar rinse to eradicate build up and enhance shine. It will also rid you of a coated feeling you may experience. Just a side note, so far in my experience with my shampoo bar, I haven't had this waxy coating / feel to my hair yet. However I did notice this symptom when I used black soap consistently for some time. I just made it a point to clarify regularly enough.
Also, having to rub the soap into your scalp and hair may cause some build up. If not rinsed out properly this will result in dry flakes and itchy scalp. Always rinse well, and follow up with an apple cider vinegar rinse every second wash or so, just to ensure that your scalp is free. In the alternative, you can always liquify it instead. You will still reap the benefits of an all-natural shampoo bar.
Some can be high foam and easy to lather, which means that it easily dissolves once exposed to water. So keep it dry as much as possible, or cut off the amount you will need for your wash in order to preserve it.
All in all, I still think the pros outweigh the cons, and in any event the simple solutions i've provided can counteract to the disadvantages.
Are you for or against shampoo bars? Comment below!
Two wash days ago I decided to try out a shampoo bar for my hair.
This is a natural soap courtesy of Green Essentials Solutions which doubles up as a shampoo bar to clean your hair.
I was really happy about the lather, softness it left my hair with and that it contained no artificial ingredients, hardeners or harsh sulfates. It is made from coconut milk, coconut and palm oils, shea butter and lavender oil, just to name a few of the natural goodies it contains. I and my scalp are definitely in love with it!
So what are the benefits of using a shampoo bar?
All natural ingredients
Less additives and preservatives
Little or no chemical hardeners
Naturally sulfate free
Convenient and easier to store and carry than your traditional bottle of shampoo
Because a shampoo bar is technically soap, it is made from the chemical reaction produced from combining fat and sodium hydroxide (saponification). Shampoo bars typaclly use natural oils such as coconut oil, olive oil, etc, or natural butters as the fat component. This means your bar of shampoo is free of the harsh detergents that compose ordinary bottled shampoos
Your shampoo bar also has less chemicals than your average liquid shampoo which requires more additives to keep your all the ingredients (solution, oils, emulsifiers etc) from separating and preserved.
Because shampoo bars contain mainly natural ingredients, they are free from artificial dyes and frances which may aggravate the scalp of eczema, sebhorric dermatitis and scalp psoriasis sufferers. Meaning they are great alternatives for that category of heads
Being oil and butter based, a shampoo bar will gently cleanse and moisturise without leaving your hair stripped
You don't have to use the whole bar at once. You can simply cut off a piece for use and store the remainder until later. This will make it last longer and save on your cash as well!
As you know me, i'll catch you next week with some cons of using a shampoo bar. As with every story, there are two sides.
Do you use shampoo bars or have you considered using one for your hair?
Earlier this year, I share with African Naturalistas how I make my rice water rinse. Read here Today, I will show you how I incorporate it along with Black Tea Rinse in my weekly wash day routine.
When I first decided to try using a clay wash on my hair, Bentonite clay was my first choice. I loved the way it clumped my curls and gave my hair a clarifying feeling but not a stripping one. I however did not like that I had to wait after applying it to my hair for it to do its job.
My Mix
Another issue I had with it was the fact that it didn't rinse off my hair as quickly and sometimes I had to use a cowash cleansing conditioner to get rid of any other residue.
When I got introduced to Rhassoul clay, the first time, I mixed it the wrong way, with a thick conditioner. Let me just say, I had the worst experience ever!! My usual black hair was brown, like someone colored it!! I was so scared. Then, I tried a different way of mixing it using just Aloe Vrera Juice and oils. I was in LOVE!!! Unlike its counterpart, my hair didn't require any additional rinse, it was soft, curls were PoPping! and my hair totally loved it.
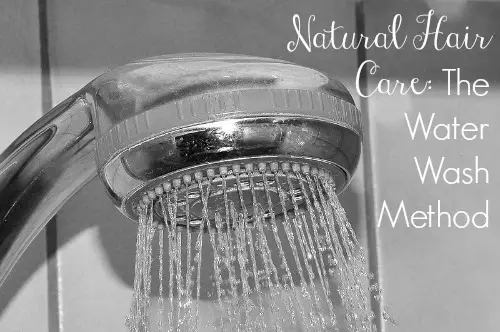
While scrolling about a few weeks ago on some natural hair care blogs, I saw a comment that gave me pause - Water Washing. Huh? What is water washing? Isn't that just rinsing? :p
Well, I decided to do a quick search on the concept of Water Washing and why anyone would or should do it. There's actually a website fully dedicated to it - Water Only Hair Washing. Yes, WOHW is an acronym, one that I had never seen before (Can there be a hair care dictionary already?)
The basic premise of Water Washing is to allow your scalp to produce sebum for protecting and moisturizing your scalp and hair strands. The method is start off with a clarifying shampoo, and then follow a regimen of rinsing and massaging your hair daily for a few weeks or so. The daily massaging and light scratching of the scalp is supposed to loosen up the sebum on your scalp, and you can distribute the natural oils from there onto your hair strands with your fingers.
There is allowance for clarifying the hair every other month (or even longer), but it's suggested that you use only natural shampoos.
The main thing that gives me interest in this method of natural hair care is that you don't need any products at all! So it's definitely pocket-friendly. You still of course need to detangle your hair often (weekly I think).
The lady who started this method says she has been doing it for over a year and is very happy with her results.
When it comes to washing your child's hair, most people believe the only way to do it is by using a shampoo. However, not all shampoos are created equal. Click here to learn more.
Instead of using shampoo all the time, you can rotate between a shampoo cleanse and these other two methods.
Cowashing
This is the process of using a cleansing conditioner to wash the hair. You might be wondering how that works. A silicone-free conditioner especially one that contains a cleansing agent works best. Not only will this method of washing your child's hair keep it clean, it also softens and moisturizes it. Always do a periodical clarifying with a shampoo to avoid product buildup.
Clay Wash
Two clays that are great for natural hair are Bentonite Clay and Rhassoul Clay. Each of them have similar properties. The thing about using clays is that they clarify your hair without stripping your natural oils. In addition, they promote shine, enhance your natural curls and coils, and also strengthen and soften the hair. No need to condition the hair after using clays. Click here to learn how to mix Bentonite Clay.
We are often told to balance our protein and moisture, and to do a hard protein treatment once per month or every six weeks.However the truth of the matter is that achieving that balance practically is still quite hard for some. Here is a realistic breakdown of how and when to use your different types of conditioners.
From left to right: moisturising conditioner, balanced conditioner, hard protein conditioner
I took down my marley twists after four weeks as opposed to six weeks which I had previously planned. I had recently bought bentonite clay and I could not wait to use it on my hair.
The first thing I did was to detangle with African Naturalistas Moisturizing and Detangling Conditioner. As always detangling was blissful. I was also glad that I didn't loose too much hair.
Next, I made my bentonite clay paste which comprised of
- Apple Cider Vinegar - Aloe Vera Juice - Coconut Oil - Lavender Oil.
I mixed everything together to make a paste which was a tad lumpy and applied it to my hair. After which, I covered it with a shower cap and satin bonnet and I went ahead with my business. An hour later, I rinsed out with cold water. Can I just say that I absolutely loved the results?
My hair was squeaky clean, soft, moisturized and well defined. My 4a coils were literally popping. I knew I could get used to this every wash day. So, I finished up with a chamomile and black tea rinse. After which I moisturized with the LOC method using Profectiv Mega Growth Daily Leave-in Strengthener, my oil mix and whipped shea butter.
This is easily one of my favorite wash days in long while.
Have anyone used bentonite clay before? How was your experience?
Tea rinses are commonly talked about in the natural hair world, and a lot of natural hair bloggers exclaim the benefits of tea rinses (Reduces shedding, Makes hair softer, Helps hair grow, and Adds shine). We even have a very popular post about them here. I had never done a tea rinse until 2 weeks ago on an impromptu wash day.
I was deep conditioning my hair with my African Naturalistas Deep Conditioner, when I decided to have a cup of tea. I like to use my DC time to relax and I find tea to be very calming. Usually, I would simply throw the tea bags away, but this time I decided to put them to good use by doing a tea rinse (another way to use your tea bags is to let them cool and place over your eyes for a few minutes).
Anyway, I used regular tea, and left the tea bags in hot water for about 30 minutes while my DC was on.
After I was done with the DC, I shampooed it off, and used the now cool tea water to rinse my hair. From what I read, you can either rinse and leave the tea in your hair, or you can rinse again with water after a little while. I decided to rinse and leave it in, because I'd noticed my hair had been shedding quite a bit. Well, I don't know if the results are supposed to be immediate, but I still had quite a bit of hair come off (I hadn't detangled in 3 weeks, or before washing).
The hair was soft though, so I liked that. Funny thing happened - my comb started to shed too while combing after the whole process!
I've had the comb for years though, so I think it's time to move on.
My hair's been cornrowed and placed under my clip-ins since then, so I don't know if it's still shedding as much or if the tea rinse worked.
I would suggest that before you do a tea rinse, research the topic first. If I had done that, I would have DC'd AFTER the tea, not before. Discovering Natural has a video on Black Tea Rinses which I'll leave below, and she says that consistency is key - she does hers twice a month.
I finally took down my bob braids after about five weeks. I initially planned to keep it for six weeks but for some reasons, I couldn't. Anyways, I already had a mud wash in mind especially since I had just gotten some Ayurvedic powders and I was itching to use them. Plus, I didn't have the time to go through the whole nine yards. So, here's what I used ;
- 3 tsp of Aritha - 3 tsp of Neem - 2 tsp of Shikaika - 1/4 cup of Aloe Vera Juice - 1 tsp of ACV - 3 tsp of Honey - 1/4 cup of Vo5 Conditioner - 3 tsp of coconut oil - 5 drops of lavender essential oil - 5 drops of eucalyptus essential oil.
Hair rinse - Peppermint Tea - Black Tea
The Process.
- I usually detangle with my hair spritz but this time, I picked a bottle of African Naturalistas Moisturizing And Detangling Conditioner to detangle. So, just as I took down each individual braid I detangled the section. It was such a breeze. By the time I was done, my whole head was soft and detangled. I almost didn't want to wash it out.
- Next, I brought out all of my ingredients and made a liquid mixture - eventually I had to pour it into an applicator bottle. Then I brewed my peppermint black tea.
- I initially used my fingers until I was tired of the dripping -which was as a result of all of the additives - and used an applicator bottle instead. I applied it in sections until I was done with my whole head, covered it up and left of the for about an hour.
-After which I rinsed out. For some reasons, I took my conditioner along as I wanted to avoid a hard, brittle hair. You never know what to expect with this powders plus it was my first time. Turns out, it was necessary. After almost exhausting the water in the tank, I noticed some tiny particles in my hair. My first thought went to the Arithapowder. In fact, it was obvious. That's why it's called a clay. If I had known I would have used hot water to completely dissolve the mixture. Anyways, I co-washed and did a tea rinse to try to get rid of the particles which just reduced it a bit.
- Then, I moisturized with my usual LOC method and braided my hair in four sections.
Oh yeah, my hair was pretty clean. It didn't feel stripped or anything, just clean. I wasn't expecting a super soft hair but it was cleansed and conditioned enough.
Now, here's what I did WRONG. - I did not read about it - which I usually do - before mixing. I just assumed all Ayurvedic powders were the same especially since I had previously used Multani Mitti.
- That, of course contributed to the liquid mixture. I should have properly measured the additives before mixing.
Will I be doing this again? He'll yeah! I'll be alternating it with my henna treatments.
So, has anyone tried this before? What's your experience like?

.jpg "What to do right on wash day")